Advanced Installation
If overwriting the Gateway with a backup is not desired, these instructions will incorporate the Launchpad OEE project into an existing Gateway.
Prerequisites
Confirm the Ignition Gateway has at least 2GB memory allocated. If not, follow the Gateway Configuration File instructions
Installation Steps
-
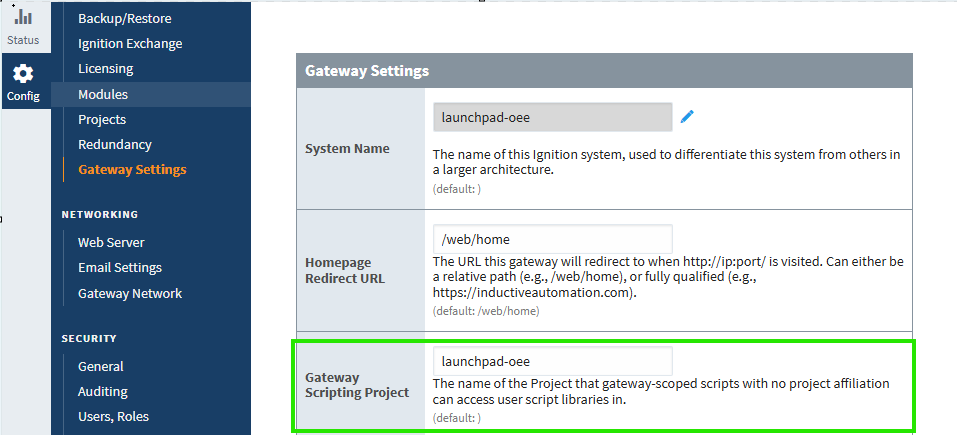
Navigate to Gateway Settings and set the Gateway Scripting Project to launchpad-oee as shown.
-
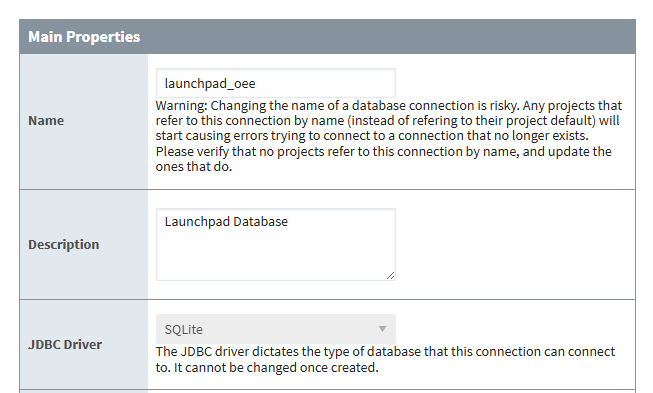
Create a SQLite database connection named launchpad-oee. See creating database connections for help with adding a new connection and connecting to SQLite for help with SQLite specific connection settings.
-
Download the
.zipfile from the Launchpad OEE Exchange page. Unzip the file to reveal the contents.launchpad_oee.1.0.0.zip
├─ MANIFEST
├─ README.md
├─ Configuration
│ └─ launchpad-oee-gateway.gwbk
├─ Projects
│ └─ launchpad-oee.zip
└─ Tags
├─ launchpad-oee-tags.json
└─ launchpad-oee-udt.json -
Import the launchpad-oee project with the provided
launchpad-oee.zipfrom the Projects folder. See detailed import instructions for more help with importing.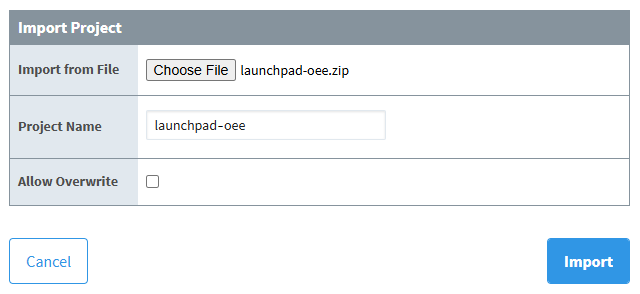
-
Open the project in the Ignition Designer. We will now import the project UDTs and the demo tags. See importing tags for more information.
-
In the Tag Browser, confirm the default Tag Provider is selected and switch to the UDT Definitions tab.

-
Import the provided
launchpad-oee-udts.jsonfile from the Tags folder. -
Switch back to the Tags tab, then import the provided
launchpad-oee-tags.jsonfile from the Tags folder.
-
-
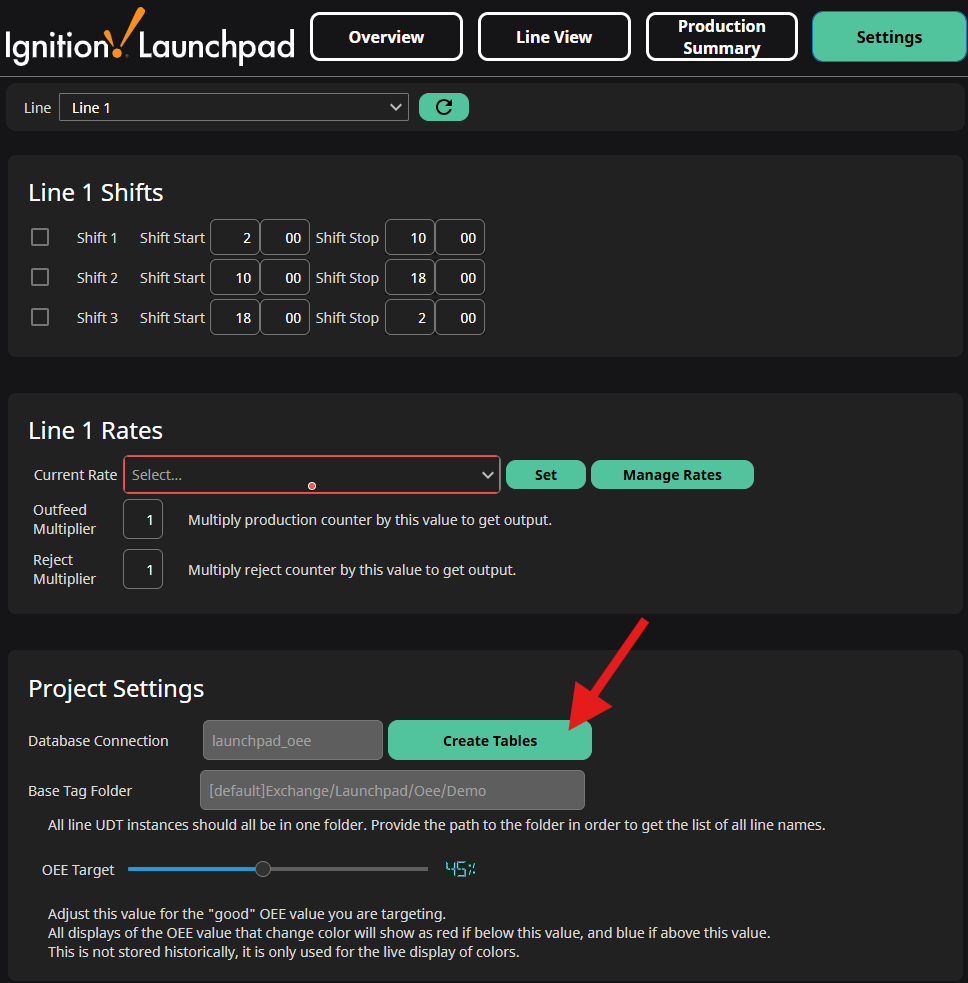
Launch a Perspective session and navigate to the Settings screen. The Settings screen allows you to control the line shift schedule and line production rates. This, along with setting up your own lines, will be covered in more detail in the Setup section. For now we need database tables to start using the project.
-
Click Create Tables to create the tables and initialize the demo.
-
Once tables are created, click the Refresh
 icon next to the line selection.
-