Tag Configuration
The Launchpad OEE project requires each line to be set up as an instance of the LineConfig UDT, with that instance connected to your devices to pull outfeed, reject, and line status information.
Device Connection
At least one device connection is required to control the line inputs from a real device. There are three line inputs: line state, production counter, and reject counter.
Creating Lines
Each line is an instance of the LineConfig UDT. All lines must be created in one folder referred to as the Base Tag Folder.
-
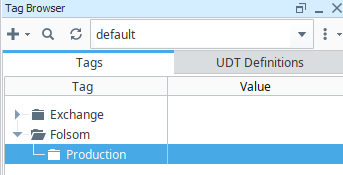
First create a new tag folder. In this example, we are setting up the Folsom site and storing our OEE tags in a Production folder.
-
Now that the folder is created, we can add new instances of the
LineConfigUDT to that folder for each line. See Creating an Instance for more instructions.- Using this example, we will right-click the Production folder, then select New Tag > Data Type Instance. Navigate from the Exchange folder to Launchpad > OEE and select the
LineConfigUDT. The new instance will be created and the Tag Editor will open. We will now configure the line.
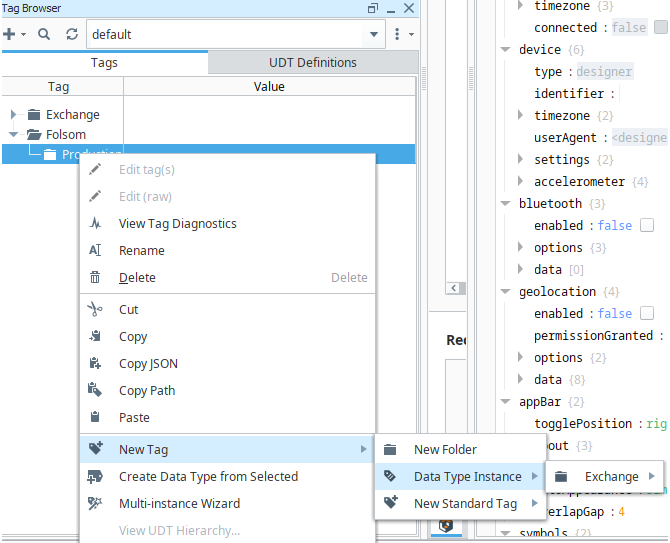
- Using this example, we will right-click the Production folder, then select New Tag > Data Type Instance. Navigate from the Exchange folder to Launchpad > OEE and select the
Line Configuration
-
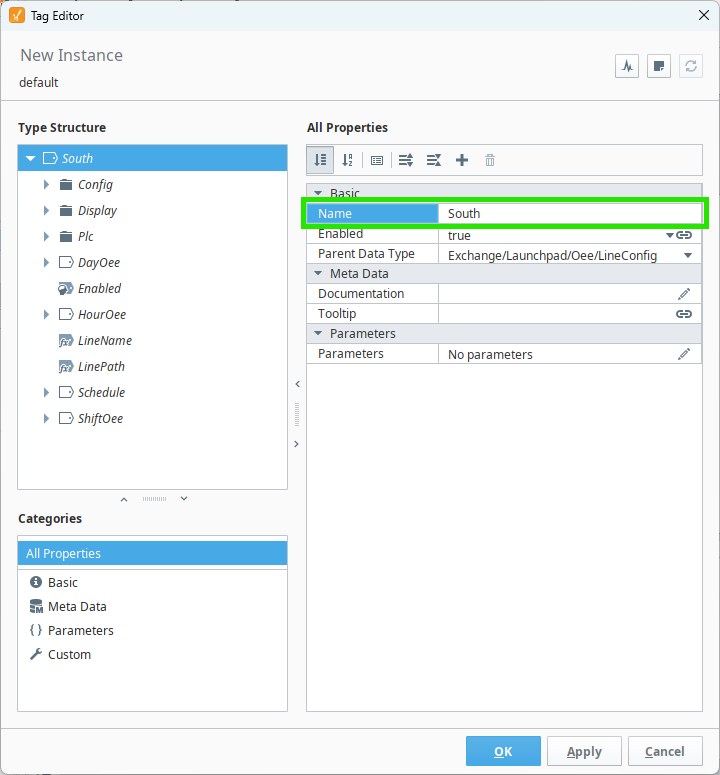
Enter a Name.
-
Name the New Instance with your line name. In this example, our line is named South.
-
-
Map the Inputs
-
Each line has up to three inputs, all located in the
LineConfig/Plcfolder. By default these are OPC tags, but they can be changed if needed. In this step you will map theProduction Counter,Reject Counter, andStateto your PLC.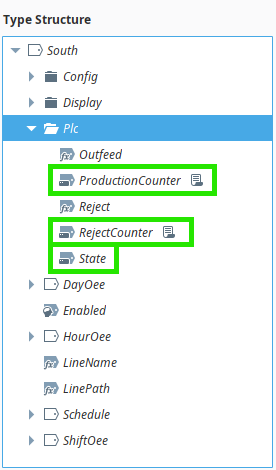
-
-
Set the Production Counter
-
The
ProductionCounterneeds to increase by 1 each time a unit is completed, so it must be mapped to your line PLC in such a way that the value increases by 1 for each unit produced.If your assembly line is configured to have multiple units completed for each signal on this tag, you can use the
Config/OutfeedFactorMemory tag to account for that. By default, theOutfeedFactortag is set to 1, so an increase of 1 on theProductionCountertag is recorded as 1 completed unit. Changing this value will multiply theProductionCounterby that value for the OEE calculations.
-
-
Set the Reject Counter
-
The
RejectCounterneeds to increase by 1 each time a unit is rejected for Quality issues, so must be mapped to your line PLC in such a way that the value increases by 1 for each unit rejected.If your assembly line is configured to have multiple units rejected for each signal on this tag, you can use the
Config/RejectFactorMemory tag to account for that. By default, theRejectFactortag is set to 1, so an increase of 1 on theRejectCountertag is recorded as 1 completed unit. Changing this value will multiply theRejectCounterby that value for the OEE calculations.
-
-
Verify the PLC State
-
The logic in the OEE and Production calculations use the following states:
- 0: Off/Idle
- 1: Running
- 2: Faulted
If your PLC states vary from this list, you will need to use Derived tags to map the states to the expected ones.
-
-
Save the tag and verify mapped values are working.
-
Change the
Enabledtag toTrueto start calculating OEE and production values and recording them to the database.
Mapping Examples
The following three examples portray how the various tags can be mapped and edited.
-
Production Counter
In this example, we will map the Production Counter in the
Southinstance of theLineConfigUDT directly to the tag address for the case counter.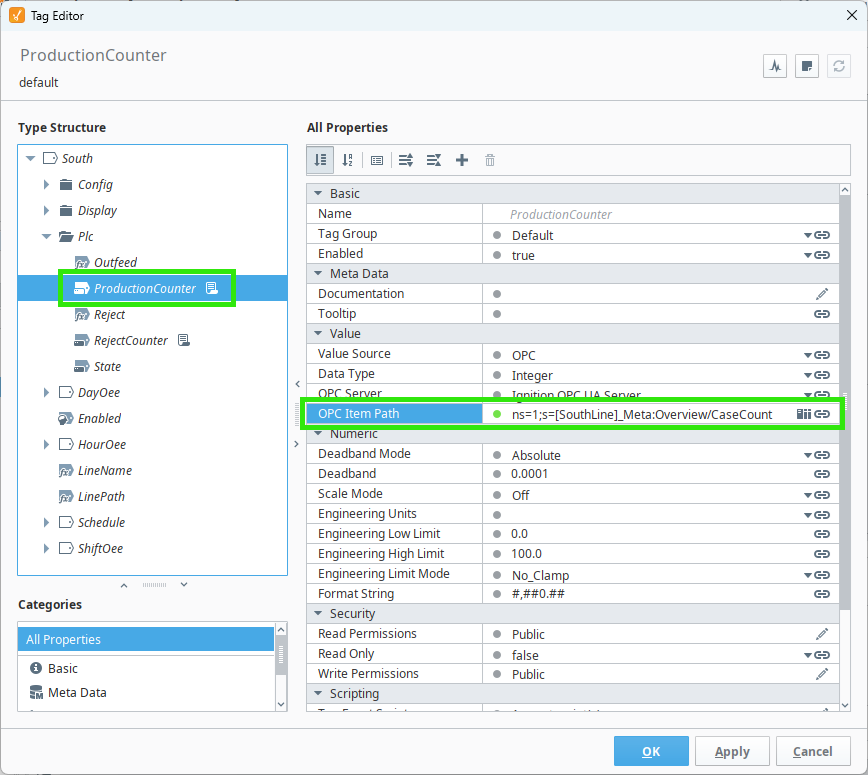
-
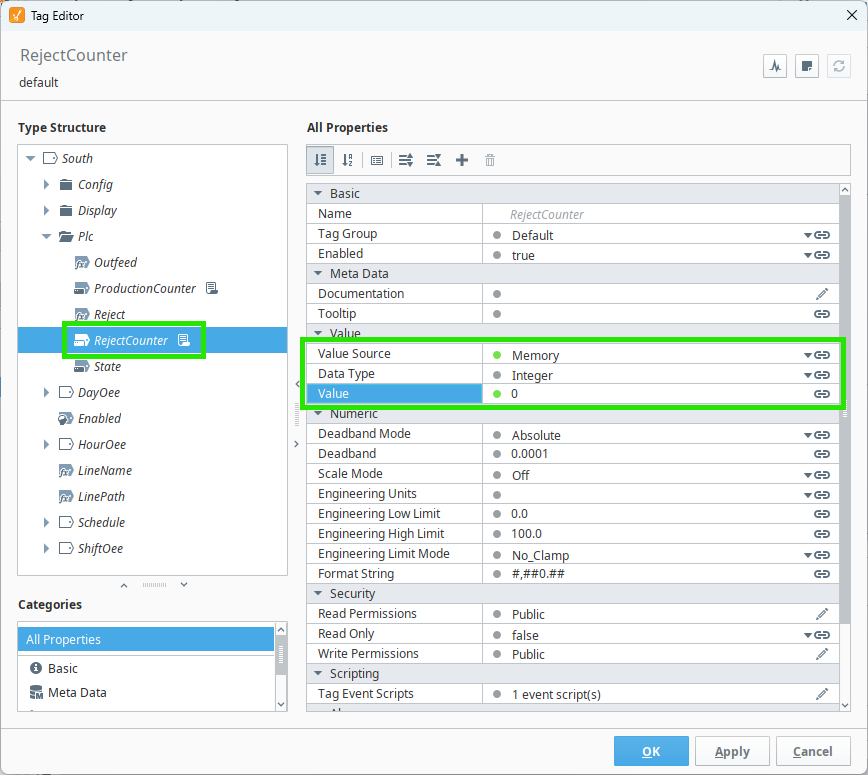
Reject Counter
In this example, we do not need a reject counter tag, so we will change the tag type to Memory with a value of zero.
-
State
Finally, we will map the State in the
Southinstance of theLineConfigUDT directly to the tag address for the line state.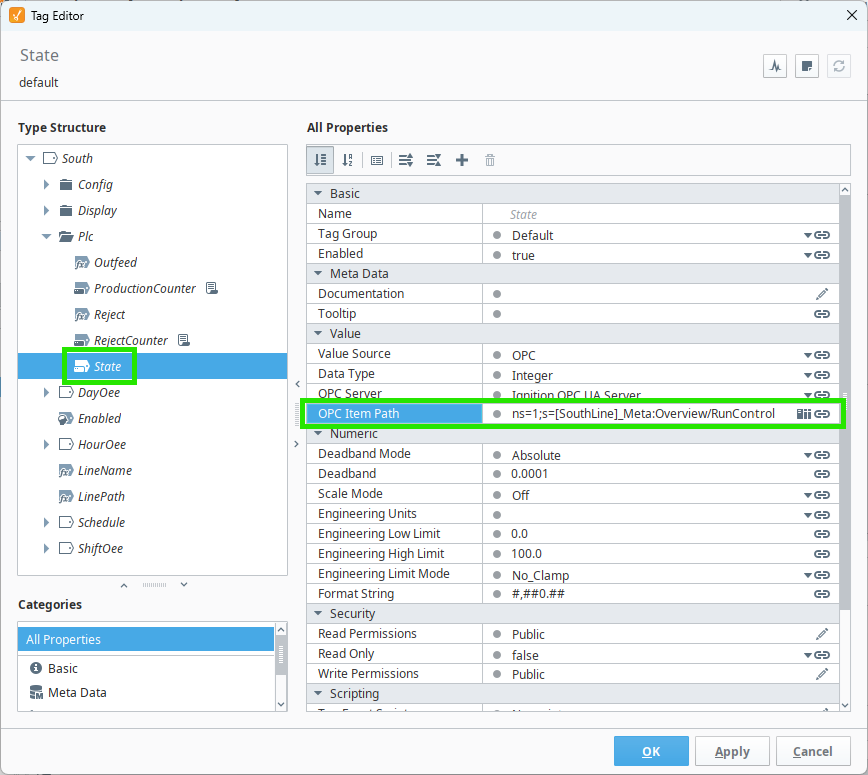
When all configuration is completed, we will click OK to save the changes and verify that the mapped values in the
Plcfolder are updating as expected.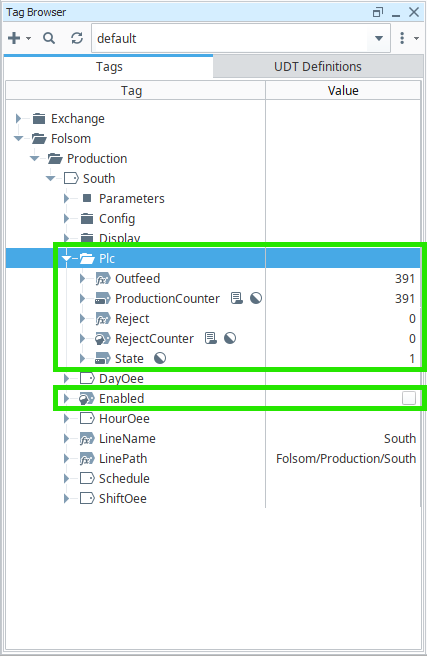
When we are sure that the new instance is working as expected, we will change the
Enabledtag toTruein order to start calculating the OEE and Production values and recording them to the database.
Base Tag Folder Update
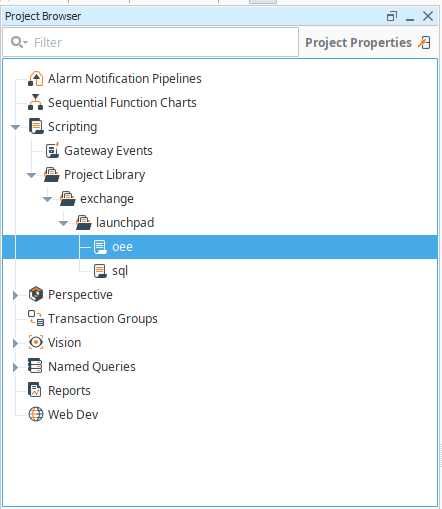
Any time the Base Tag Folder is changed, you'll need to update the oee script. To do this, navigate to the exchange/launchpad/oee script in the Project Browser and click to open it.
Update the Base Tag Folder value to match the folder you created and save the project. From the example above, we would make the new value "[default]Folsom/Production".

Line Refresh
Any time a new line is configured or the line configuration has be edited, you'll need to to refresh the line display on the Settings screen. Red overlays will appear on the screen to indicate the project needs to be refreshed. Click the Refresh ![]() icon next to the Line selection dropdown to initiate a tag browse on the Base Tag Folder, which will populate the line list correctly.
icon next to the Line selection dropdown to initiate a tag browse on the Base Tag Folder, which will populate the line list correctly.
![]()